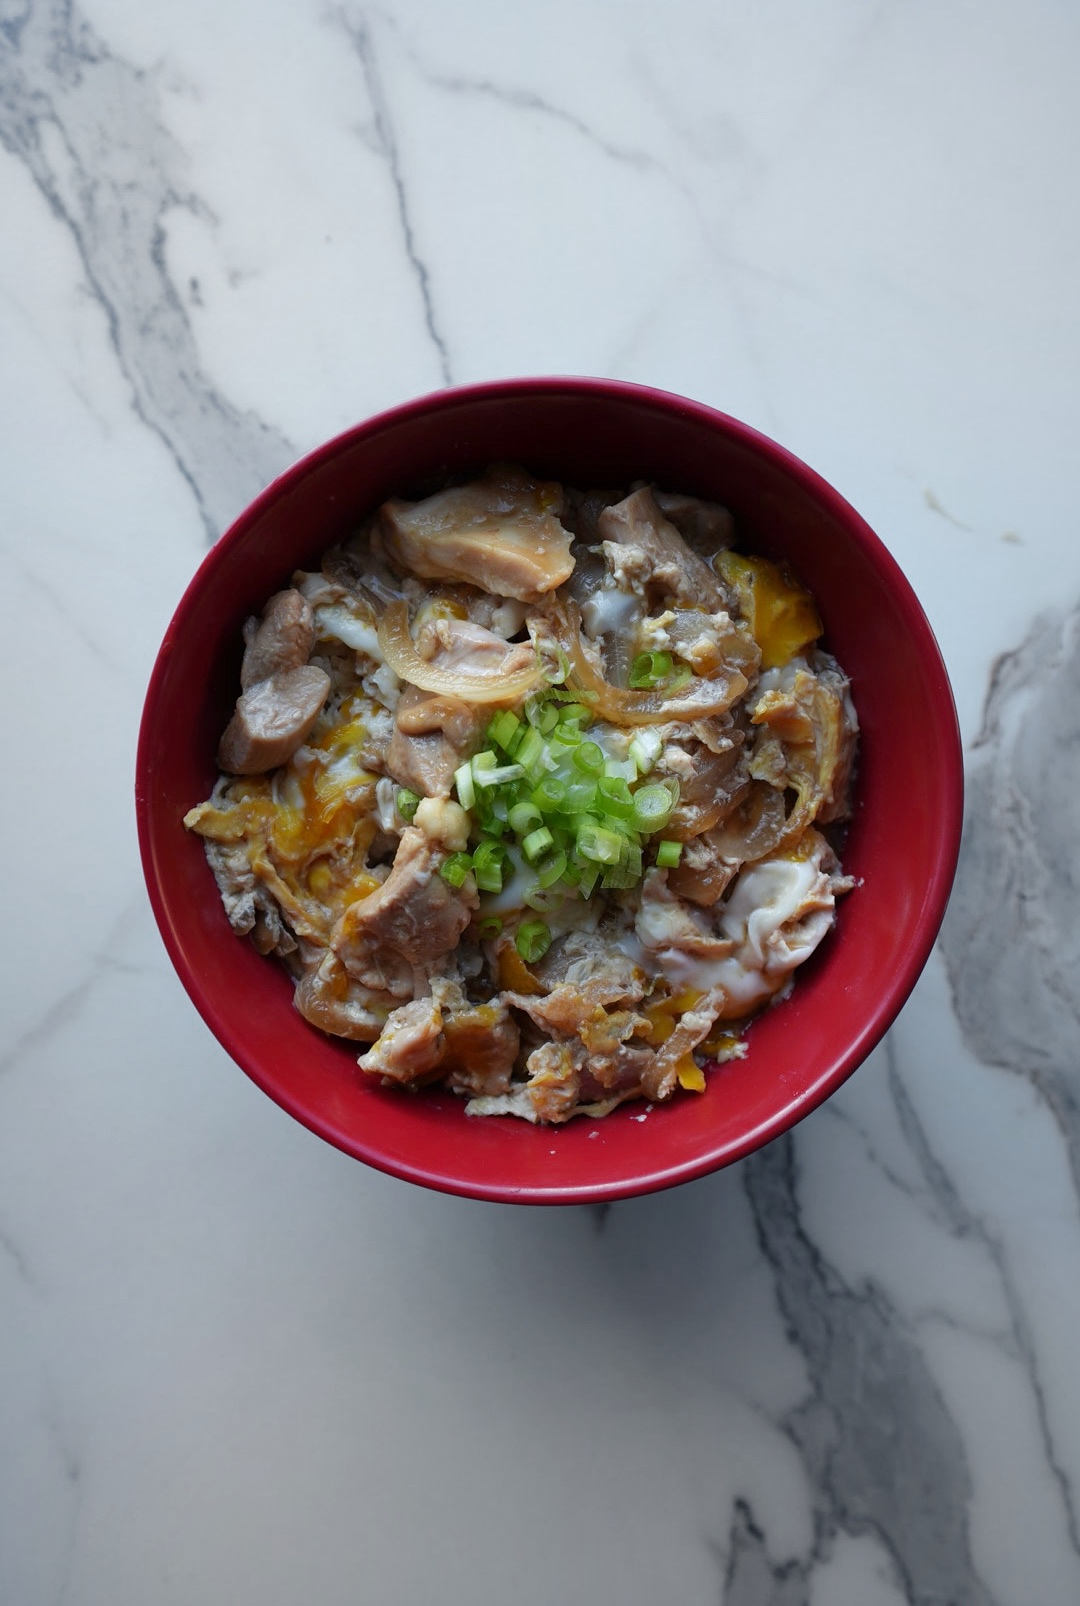
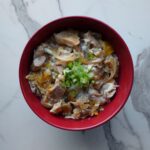
Oya (親), ko (子), and don (丼) literally translates to parent-child-bowl, referring to the use of both chicken (parent) and eggs (child) in the recipe. A little morbid, I know.
It’s a type of donburi, which is a Japanese rice bowl dish typically served with various toppings. I grew up eating oyakodon, which is made by simmering bite-sized pieces of chicken and thinly sliced onions in a savory broth made from dashi, soy sauce, mirin, sake, and sugar.
Once the chicken is cooked through and the onions are tender, lightly beaten eggs are poured over the mixture and gently cooked until they are set but still slightly runny.
The entire mixture is then served over a bowl of steamed white rice and garnished with chopped green onions and sometimes shichimi togarashi for an extra kick.
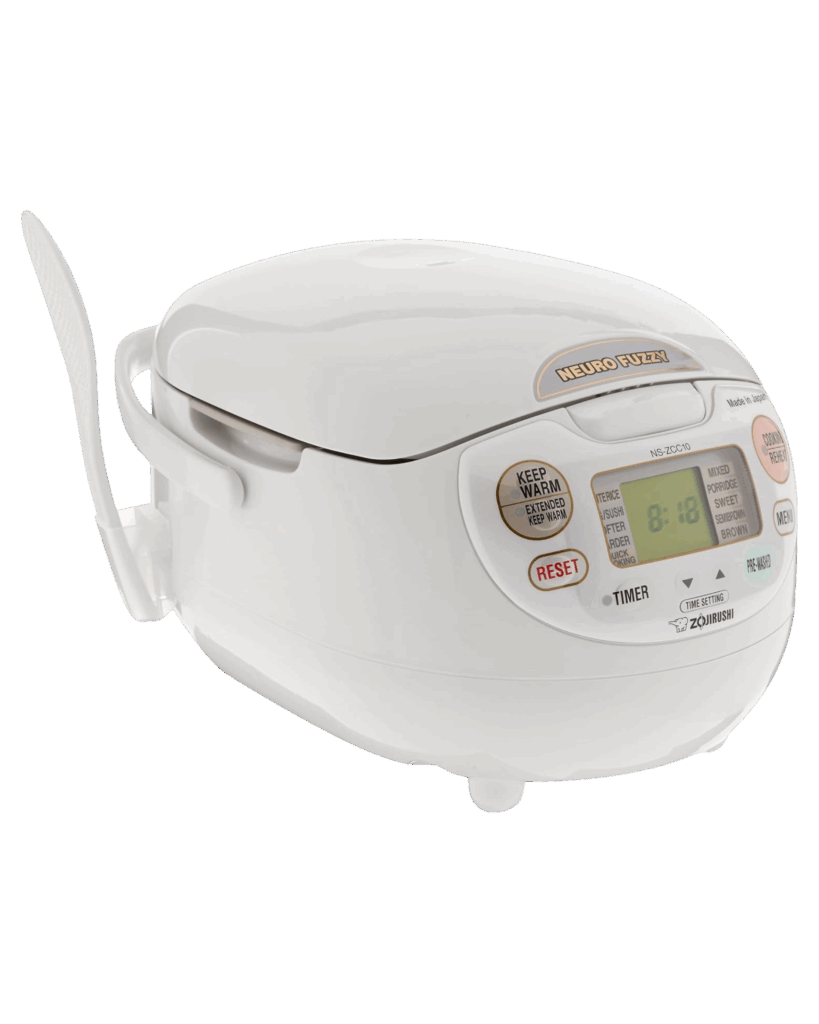
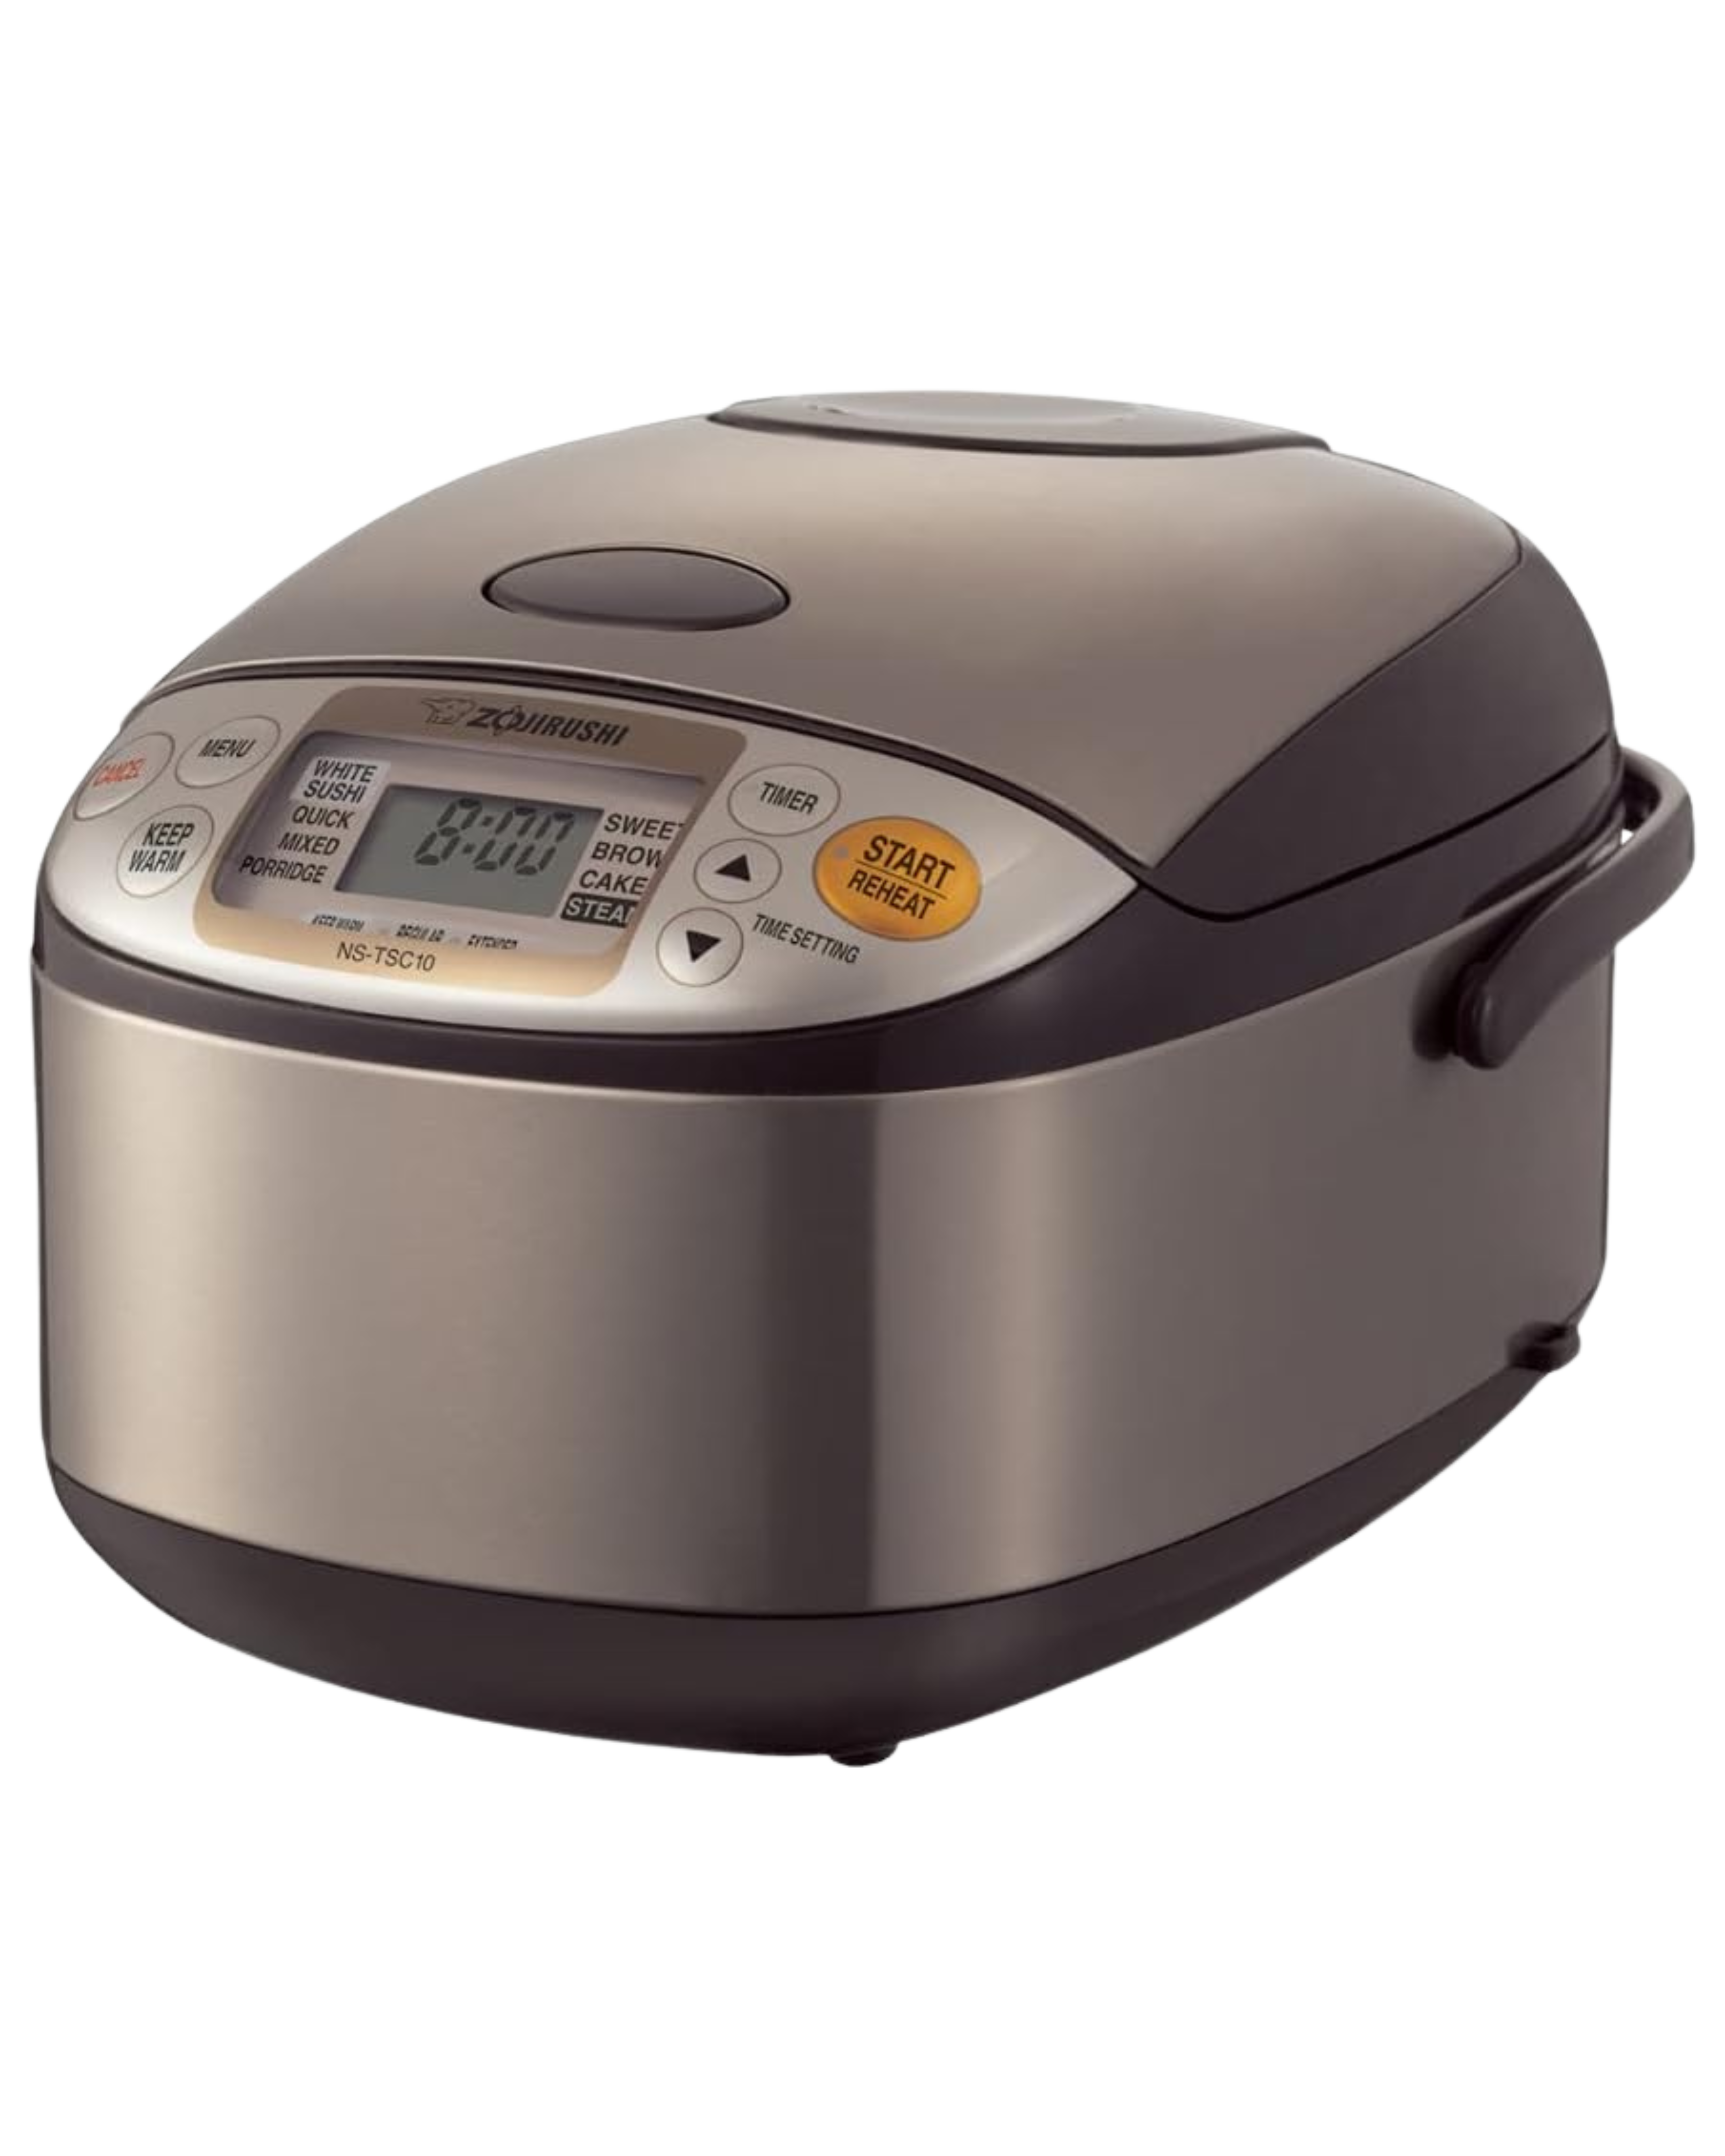
Recommended Rice Cookers
Do I need to have a fancy rice cooker to make this meal? NO!
Just like anything, generally, the higher the quality, the better. But you can make my rice cooker meals in a cheap rice cooker, too!
Click the rice cooker photos to see my top picks, from $20–$200! I use the Tiger 5.5-cup model shown. About 1/2 cup of Japanese short- or medium-grain rice makes 1 serving.
Key Features to Look For in a Rice Cooker:
- Steaming Basket or Tray: Allows you to steam vegetables or cook other ingredients while the rice cooks.
- Multiple Cooking Functions: Ensure it has settings for steaming, slow cooking, and possibly even baking.
- Non-Stick Inner Pot: Makes cleaning easier and prevents sticking.
- Timer and Keep Warm Function: Useful for planning meals ahead of time and keeping them warm until you’re ready to eat.

5.5 cups or 10 cups
5.5 cups or 10 cups
3 cups
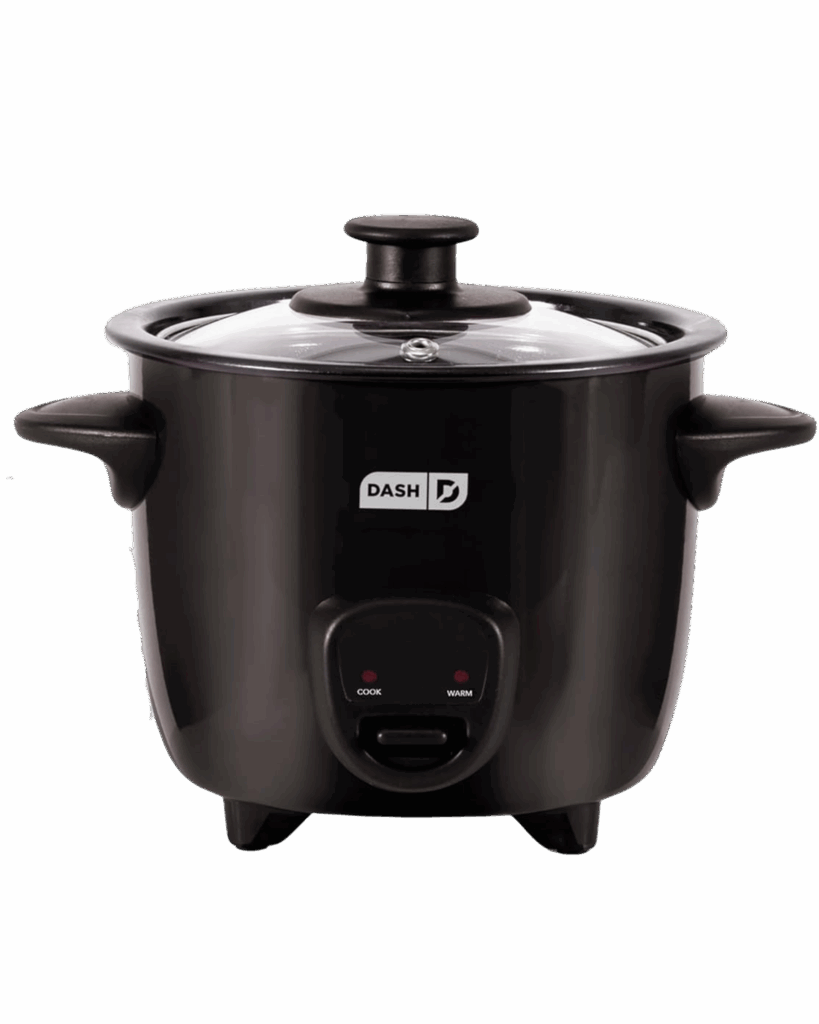
2 cups
What Type of Rice Should I Use?
Choosing the right type of rice can be confusing, especially with so many varieties available. From long-grain basmati to aromatic jasmine rice, each type has its own texture and flavor. In Japanese cooking, however, Japanese short-grain or medium-grain rice is almost always the go-to choice.
Short-grain rice, often labeled as sushi rice, is particularly prized for its soft and chewy texture, which pairs beautifully with traditional Japanese dishes.
Medium-grain rice is a great alternative if short-grain isn’t available (I actually almost always use medium-grain myself because it’s generally cheaper where I live!). Both are ideal for recipes like this one, where the rice’s stickiness helps meld the flavors into every bite.

How to Make Dashi: Japanese Cooking Stock
Dashi is an essential ingredient in Curry Udon. It’s a light Japanese broth made from ingredients like kombu (dried kelp) and katsuobushi (dried bonito flakes), forming the savory, umami-rich base for many Japanese soups and sauces.
Here are 3 different ways to make it:
1. Dashi from Scratch: Traditional dashi, made by simmering kombu (dried kelp) and katsuobushi (dried bonito flakes), is considered the best method. Soak the kombu in water, heat just below boiling, and add katsuobushi. This method is ideal for dishes with the purest flavor.
2. Dashi Packets (pictured): Dashi packets, resembling tea bags, contain dried kombu, katsuobushi, and sometimes shiitake mushrooms or dried sardines. Just simmer the packet in water for a few minutes for a quick and flavorful broth.

I love these dashi packets from Kayanoya.
3. Instant Dashi (Hondashi): Instant dashi, often called hondashi, is a granulated or powdered form of dashi. Just a spoonful dissolved in hot water creates a quick and flavorful stock.
This option is convenient and ideal for busy days. I recommend instant dashi as the easiest experience for beginners.

I use this instant dashi from Ajinomoto most frequently.
Oyakodon (親子丼)
- Total Time: 15 minutes
Description
Oyakodon is a classic Japanese rice bowl dish featuring tender chicken and onions simmered in a savory dashi broth, topped with lightly beaten eggs and green onions.
*I would not recommend cooking more than 2 servings per pan. If you need to make more than 2, use separate pans. This is to ensure that the heat is distributed evenly when cooking.
Ingredients
- 2 servings Japanese short-grain or medium grain rice, cooked
- 1 lb chicken thighs, diced
- 3/4 large yellow onion, thinly sliced
- 2 tbsp soy sauce
- 3/4 cup dashi (ingredients below; substitute for 1 tablespoon of hondashi, which is a form of instant dashi, and just add 3/4 cup water)
- 2 tablespoons mirin
- 1 teaspoon granulated sugar
- 4–5 eggs, beaten
- Chopped green onions for garnishing (optional)
Dashi Ingredients:
- 4 cups water
- 1 piece of kombu (dried kelp), about 10 cm (4 inches)
- 1 cup katsuobushi (dried bonito flakes)
Instructions
- In a medium-sized pan over medium heat, add the dashi (instructions below), soy sauce, mirin, and sugar.
- Add the sliced onions and diced chicken pieces. Cook until the chicken is cooked all the way through, about 6-8 minutes. Flip the chicken halfway through.
- Reduce the heat to low. Pour a little more than 1/2 of the beaten eggs evenly over the chicken and onions, away from the edges of the pan. Cover the pan with a lid and let it cook for about 1-2 minutes, or until the eggs are just set but still slightly runny. Pour the remaining eggs around the edges and cook for 30 seconds.
- Divide the cooked rice between two bowls. Carefully spoon the chicken, onions, and egg mixture over the rice. Garnish with green onions.
Dashi Instructions:
- Place the kombu in a pot with the water and let it soak for about 30 minutes.
- After soaking, heat the water over medium heat. Just before it begins to boil, remove the kombu from the pot.
- Once the kombu is removed, bring the water to a boil, then add the katsuobushi. Let it simmer for about 5 minutes.
- Turn off the heat and strain the broth through a fine mesh sieve or cheesecloth to remove the bonito flakes. Use immediately or store in the fridge for up to a few days.
- Prep Time: 5 minutes
- Cook Time: 10 minutes
Nutrition
- Serving Size: 2


Made this yesterday, easy and yummy comfort food.
So glad to hear! Thanks for sharing, Erin!
Easy to make and a great comfort meal for sick kids and adults!
So glad to hear! Thanks Janessa!
I love this dish! Please keep creating more like it Kyrie the Foodie!
Thanks for sharing Lillian! More to come 🙂
The chicken and egg cooked together in one pan made this feel like true comfort food.
Thank you for your review, Marshall! 🙂
I make this at least once a week and even my kids love it!
Awww so glad to hear that, Jennifer! Thanks for sharing!