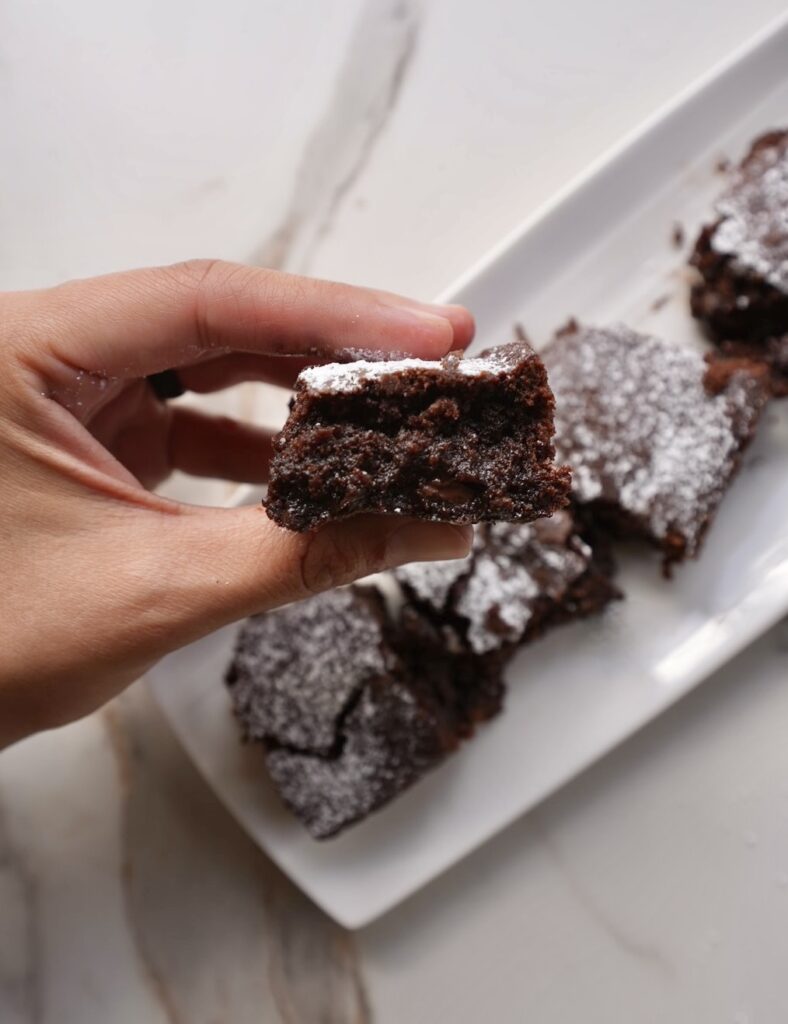
My chocolate mochi brownies are the perfect fusion of classic fudgy brownies and chewy Japanese mochi.
Made with glutinous rice flour, they have a distinctive bounce and satisfying chew that sets them apart from anything made with regular wheat flour. The texture is soft and gooey in the center with just enough structure on the edges to hold each slice beautifully – especially after cooling.
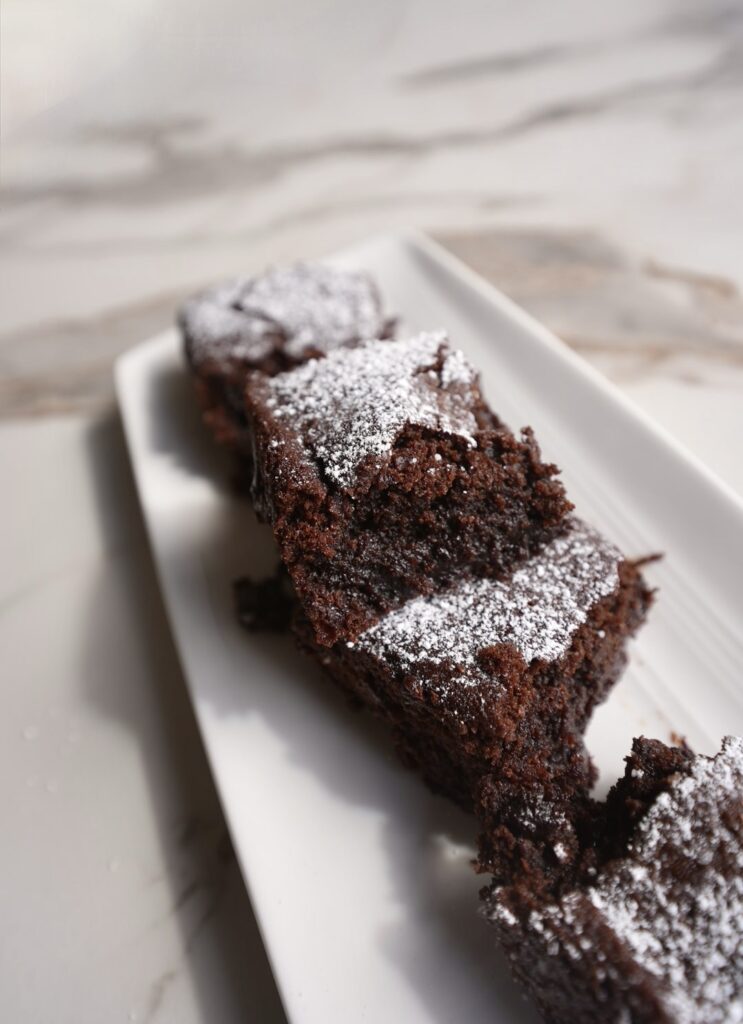
Heavy cream and melted butter give the batter a luxurious richness, while cocoa powder brings deep chocolate intensity. Lots of sugar ensures the flavor is balanced and indulgent, and a pinch of salt sharpens everything just enough to keep it from feeling too sweet.
Plus the addition of chocolate chips? They melt into little pockets throughout the brownies, giving bursts of chocolate in every bite.
Once baked and cooled, a dusting of powdered sugar on top adds a beautiful contrast. Delicate and sweet, but never overpowering.
These brownies feel special enough for a celebration but are easy enough to whip up anytime you’re craving something unique and comforting. The result is a dessert that’s both familiar and unexpected.
Chewy, rich, and deeply chocolatey.

Main Ingredient: Sweet Rice Flour
Sweet rice flour, also known as glutinous rice flour or mochiko, is a key ingredient in making mochi. Mochi is a chewy Japanese rice cake made from glutinous rice that’s pounded into a smooth, stretchy dough and used in both sweet and savory dishes. It’s often enjoyed during festive occasions such as New Year’s celebrations or as a yummy snack any time of the year.
Unlike regular rice flour, sweet rice flour is made from short-grain glutinous rice, which has a higher starch content, giving mochi its signature chewy texture.
When mixed with water and sugar, sweet rice flour forms a sticky dough that can be steamed, boiled, or pounded into various shapes and filled with sweet fillings like red bean paste or fruit.
Also, the best part? Sweet rice flour is gluten-free!


Other Main Ingredients
- Butter: Adds richness, moisture, and a deep, comforting flavor. It also helps create that slightly crispy edge when baked. The higher-quality butter you can get for this, the better!
- Sugar: Provides sweetness. I use granulated white sugar, but you could also use brown sugar for a hint of caramel flavor.
- Cocoa Powder: Gives a deep, rich chocolate flavor that balances the sweetness and enhances their fudgy texture.
- Heavy Cream: Makes the brownies richer, fudgier, and creamier while softening the chewiness.
- Baking Powder: Adds just a bit of lift, giving the mochi a slightly lighter texture while still keeping it dense and chewy.
- Vanilla Extract: Adds warmth and depth of flavor, rounding out the sweetness and enhancing the buttery notes.
Love Mochi?
Check Out My Other Mochi Recipes!

Fudgey Chocolate Mochi Brownies
- Total Time: 1 hour 5 minutes
Description
My chocolate mochi brownies are ultra-fudgy and chewy with a mochi-like bounce, a rich chocolate flavor, and a creamy, melt-in-your-mouth finish thanks to the heavy cream.
Ingredients
- 2 cups glutinous rice flour
- 2 1/4 cups sugar
- 3/4 cup unsweetened cocoa powder
- 3 tsp baking powder
- 1 teaspoon salt
- 1 cup water
- 1 cup heavy cream
- 1 1/3 cup butter, melted
- 1 teaspoon salt
- 1/2 tablespoon vanilla extract
- 1 cup chocolate chips
- 1/4 cup powdered sugar (for topping)
Instructions
- Preheat your oven to 350°F (175°C) and grease a 9×13-inch baking dish (or line with parchment).
- In a large bowl, whisk together the glutinous rice flour, sugar, cocoa powder, baking powder, and salt.
- In a separate bowl, combine the water, heavy cream, melted butter, and vanilla extract.
- Pour the wet ingredients, as well as the chocolate chips, into the dry ingredients and mix until smooth and well combined.
- Pour the batter into the prepared pan and smooth out the top. Bake for about 50 minutes, or until the top is set and a toothpick inserted in the center comes out mostly clean (a little moisture is okay — it’ll firm up as it cools).
- Let cool completely before using a fine mesh sieve or sifter to sprinkle on powdered sugar before slicing.
- Prep Time: 15 minutes
- Cook Time: 50 minutes


I love the chewiness in mochi brownies! And so does my family.
Your family has great taste! Thanks for sharing, Mira!
These stayed soft even the next day. Definitely making again!
They’re so good leftover too! So happy to hear! 🙂